
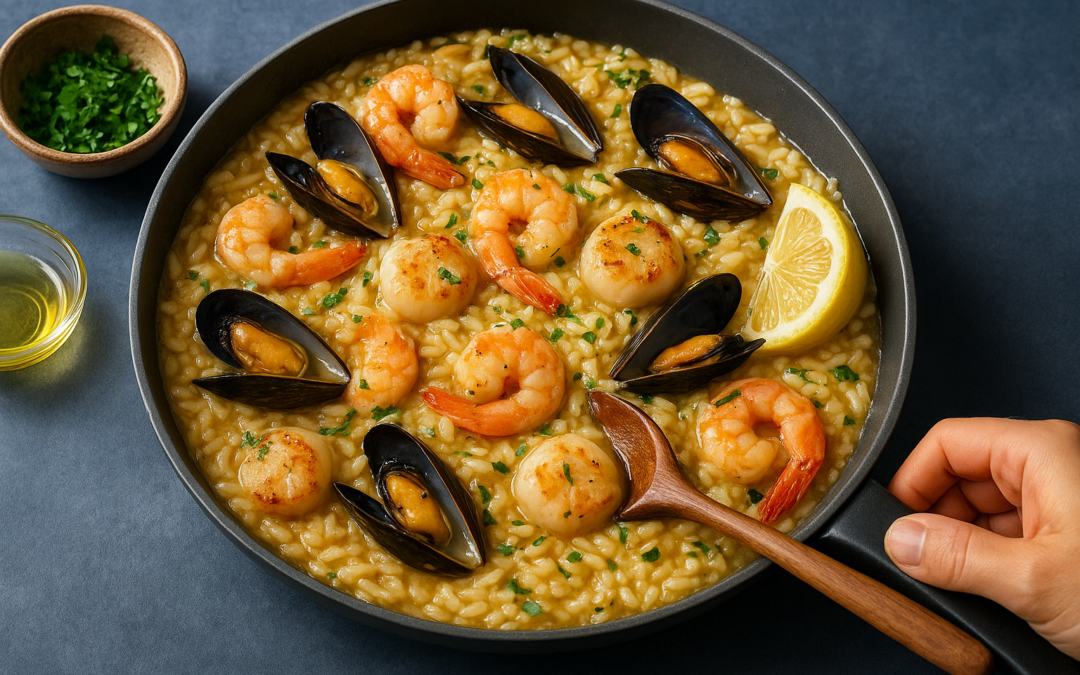
Seafood risotto looks impressive on a plate, but the process behind it is more forgiving than most people think. If you’ve been wondering how to cook seafood risotto at home without the anxiety of ruining expensive shellfish or ending up with gummy rice, you’re in the right place. The dish is absolutely worth learning, it’s one of the most satisfying things you can pull off in a home kitchen, and the technique is straightforward once you understand what’s actually happening in the pan.
At La Dolce Vita Cucina, our kitchen in Chicago’s Portage Park neighborhood works with Italian fundamentals every day, from homemade pasta to seafood dishes that rely on proper timing and quality ingredients. Risotto is one of those recipes where small details make a big difference: the type of rice, the temperature of your stock, when you add the seafood. We’ve put together this guide based on the same principles we follow in our own kitchen.
Below, you’ll find a complete step-by-step method for creamy seafood risotto, including ingredient lists, timing tips for different types of shellfish, and the techniques that keep the texture right. Whether you’re cooking for a date night or a Saturday dinner with family, this guide will walk you through every stage from prep to plate, no culinary degree required.
What makes seafood risotto work
Before you start learning how to cook seafood risotto, it helps to understand why the dish behaves the way it does. Risotto works through a specific process of starch release and liquid absorption that creates the creamy consistency people associate with a well-made bowl. When you skip or rush any part of that process, you end up with rice that’s either too firm, too mushy, or just bland. Understanding what’s actually happening in the pan removes the guesswork and makes you a more confident cook before you even turn on the stove.
The right rice releases the right starch
Arborio, Carnaroli, and Vialone Nano are the three main rice varieties used in risotto, and they all share one important trait: a high concentration of amylopectin, a type of starch that dissolves slowly into liquid as you stir. This is what creates the creamy texture without adding cream. Arborio is the easiest to find in most US grocery stores and works well for a home cook. Carnaroli holds its shape slightly better under heat, which makes it the preferred choice in many restaurant kitchens, but either variety will give you a solid result if you follow the process correctly.
The variety you pick matters far less than how you treat the rice once it’s in the pan.
Each grain needs to be coated in fat before liquid touches it. When you toast the rice in oil or butter for two to three minutes, you seal the outer layer just enough to slow the starch release, which gives you more control over the final texture. If you skip this step, the rice absorbs liquid unevenly and the dish turns gluey instead of creamy.
Seafood timing is where most mistakes happen
Seafood and rice do not cook at the same speed. Rice takes 18 to 20 minutes from the moment you start adding stock, while shrimp can be fully cooked in two to three minutes and scallops in four. If you add your seafood too early, it overcooks long before the rice is ready. Tough, rubbery shellfish is the most common complaint people have about homemade seafood risotto, and nearly all of it comes from adding the protein at the wrong stage.
The solution is to treat the seafood as a finishing ingredient rather than something you build the dish around from the start. You build the rice base completely first, and the seafood goes in during the final three to five minutes of cooking. This approach keeps the texture where it needs to be: firm on the outside and just cooked through in the middle.
Stock temperature controls your texture
Cold or room-temperature stock added to hot rice slows the cooking process unevenly and causes the exterior of each grain to firm up before the interior softens. The result is inconsistent texture throughout the dish. You need to keep your stock warm, not aggressively simmering, but consistently hot in a separate pot while you build the risotto beside it.
A steady ladle-by-ladle addition of warm stock is what gives the dish its characteristic creaminess. Each addition should be mostly absorbed before the next one goes in. This rhythm, combined with regular stirring to coax out the starch, is the actual technique that makes risotto what it is. You don’t need any special equipment to do this right, just attention and a warm pot of stock sitting close to your pan.
Get your ingredients and tools ready
Getting organized before you start cooking saves you from scrambling mid-recipe when the rice is toasting and your stock isn’t hot yet. Risotto moves at a steady pace once it starts, so having everything measured, prepped, and within arm’s reach is the single most practical thing you can do before you learn how to cook seafood risotto properly. Treat this section as your pre-game checklist.
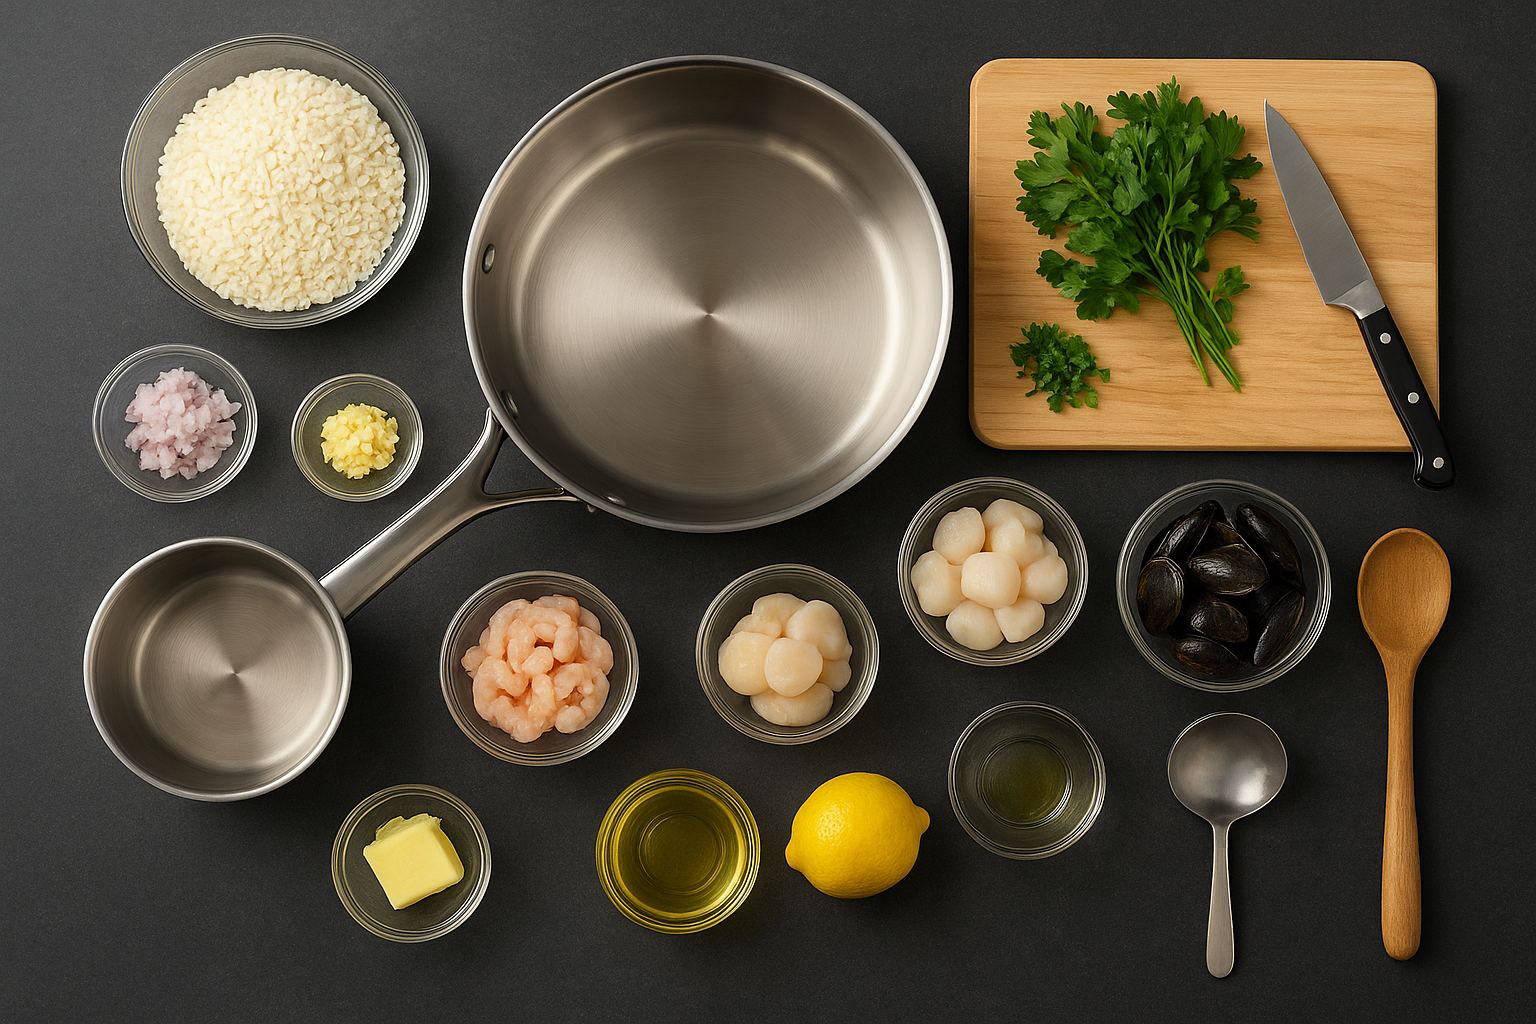
The ingredients list
The recipe below serves four people as a main course. You can scale it up, but keep the ratios consistent between the rice, stock, and seafood.
| Ingredient | Amount | Notes |
|---|---|---|
| Arborio or Carnaroli rice | 1.5 cups (300g) | Do not rinse it |
| Shrimp (peeled, deveined) | 0.5 lb (225g) | Medium or large size |
| Sea scallops | 0.5 lb (225g) | Pat dry before cooking |
| Clams or mussels | 0.75 lb (340g) | Scrubbed and debearded |
| Seafood or fish stock | 6 cups (1.4L) | Homemade or store-bought |
| Dry white wine | 0.5 cup (120ml) | Pinot Grigio or Sauvignon Blanc |
| Shallots | 2 medium | Finely diced |
| Garlic | 3 cloves | Minced |
| Olive oil | 2 tablespoons | For the base |
| Unsalted butter | 2 tablespoons | Added at the finish |
| Flat-leaf parsley | A small handful | Chopped, for garnish |
| Salt and black pepper | To taste | Season throughout |
| Lemon | 1 | Zested and juiced at the end |
Store-bought seafood stock works fine, but choose a low-sodium version so you control the salt level as you cook.
The tools you need
You do not need professional kitchen equipment to pull this off. A wide, heavy-bottomed pan is the most important item on this list. A 12-inch skillet or a shallow braiser gives the rice enough surface area to cook evenly and lets the liquid absorb without pooling. A thin-bottomed pan heats unevenly and makes it harder to control the starch release.
Here’s what to have ready before you turn on the burner:
- Wide, heavy-bottomed pan (12-inch skillet or braiser)
- Medium saucepan for keeping the stock warm
- Wooden spoon or heat-resistant silicone spatula
- Ladle for adding stock one portion at a time
- Sharp knife and cutting board
- Microplane or fine grater for lemon zest
- Kitchen timer
Having two burners running at the same time is standard for this recipe. One holds the stock at a low simmer while the other handles the rice. Keep your tools and prepped ingredients on the counter beside you before you start.
Step 1. Build a flavorful seafood stock
Good stock is the foundation of the entire dish. Every ladle you add to the rice during cooking carries flavor directly into each grain, which means a flat or watery stock will produce a flat-tasting risotto no matter how careful your technique is elsewhere. If you want to understand how to cook seafood risotto at a level that actually impresses, start here: the stock stage is where you build the savory depth that makes the finished bowl taste intentional rather than just acceptable.
Why homemade stock beats store-bought
A quick homemade seafood stock takes about 25 minutes from start to finish, and it gives you full control over the salt level and flavor intensity in a way that no carton from the grocery store can match. You use the shells from your shrimp plus a few inexpensive aromatics, and what you end up with is a stock that smells and tastes like the ocean. Store-bought versions tend to run either too salty or too mild, and both problems will show up in your risotto after you add six cups of liquid to the rice over 20 minutes of cooking.
That said, using the shrimp shells is also a practical choice. You are already peeling the shrimp as part of your prep, so the shells cost you nothing extra and take about two minutes to cook in the pot before everything else goes in. Wasting them means leaving flavor behind that would otherwise go directly into your finished dish.
If you are short on time, a low-sodium store-bought seafood or fish stock will work, but taste it before you heat it and adjust the seasoning accordingly.
How to make a quick seafood stock
You only need the shrimp shells you already have plus a few pantry staples. Rinse the shells briefly under cold water before you start to remove any gritty residue, then follow this process:
- Heat 1 tablespoon of olive oil in a medium saucepan over medium heat.
- Add the shrimp shells and cook for 2 minutes, stirring occasionally, until they turn pink and fragrant.
- Add 1 small onion (halved), 1 celery stalk, 3 whole peppercorns, and 1 bay leaf.
- Pour in 7 cups of cold water to account for evaporation during simmering.
- Bring to a gentle simmer and cook uncovered for 20 minutes.
- Strain through a fine-mesh strainer and discard the solids.
- Keep the strained stock warm over low heat while you build the risotto.
You should end up with approximately six cups of finished stock. Season lightly with salt after straining, taste it, and adjust before the stock goes anywhere near the rice.
Step 2. Prep seafood so it stays tender
How you handle the seafood before it hits the pan determines the final texture more than any other single factor in this recipe. Properly prepped shellfish cooks quickly and evenly, while poorly prepped seafood releases excess moisture, steams instead of sears, and turns soft in the wrong way. This step takes about ten minutes total, but skipping or rushing it is the main reason home cooks end up with rubbery results when learning how to cook seafood risotto.
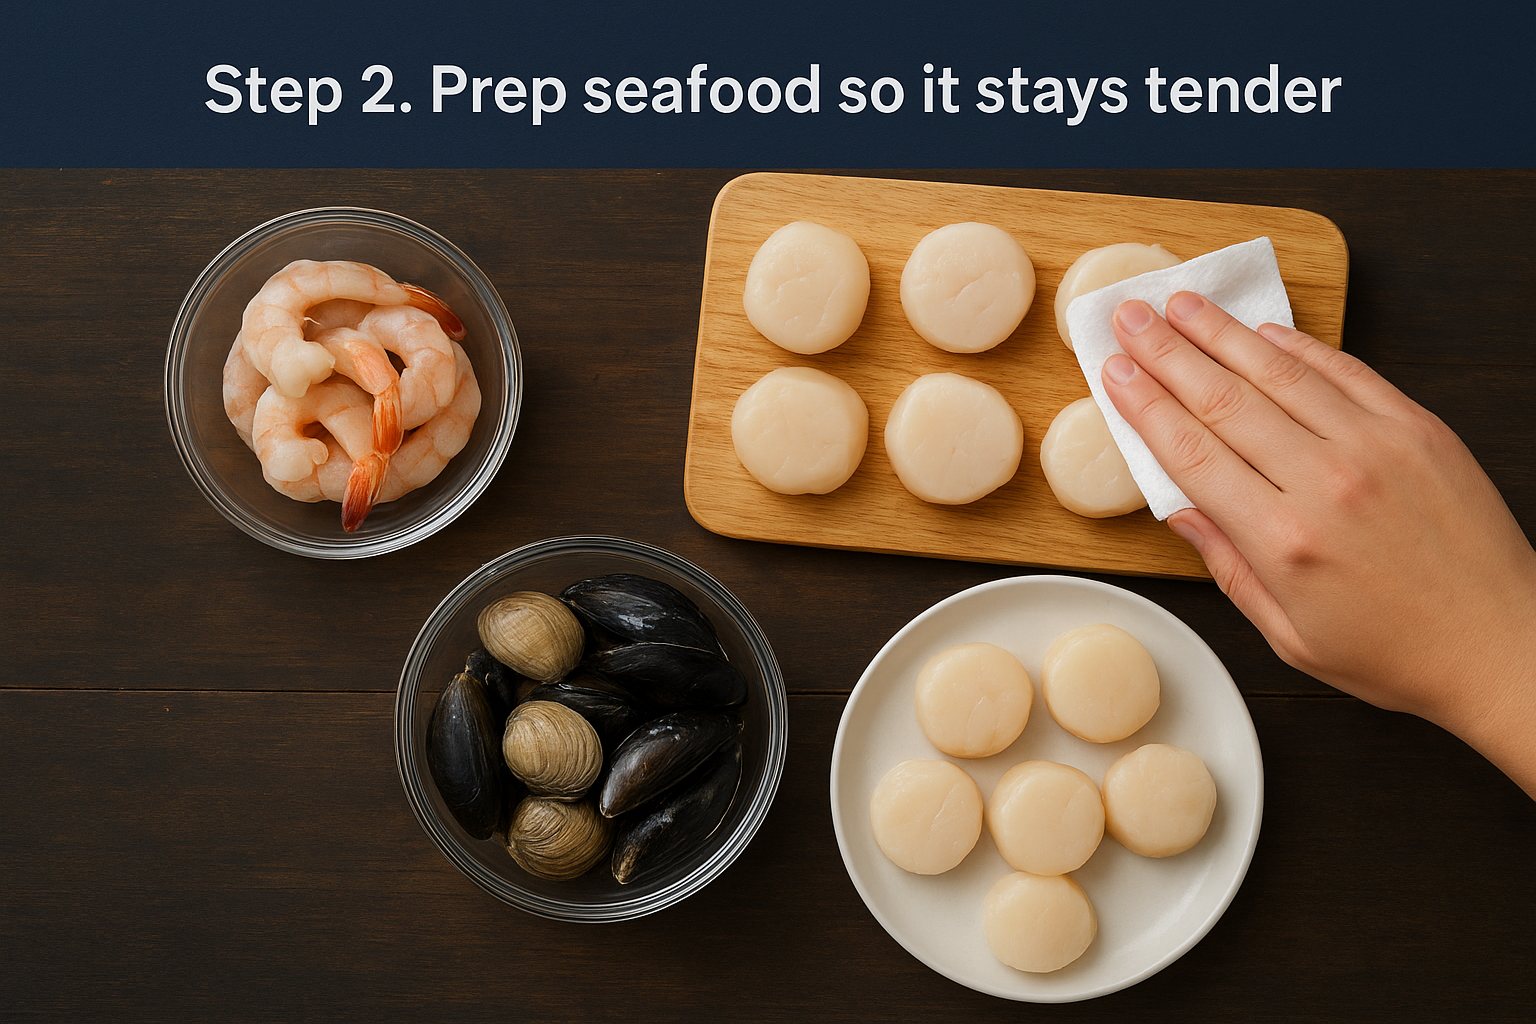
Clean and dry each piece correctly
Pat every piece of seafood dry with paper towels before you do anything else. This applies to shrimp, scallops, and any clams or mussels you’ve already opened or steamed. Surface moisture creates steam in the pan, which drops the temperature and prevents proper browning on scallops or a clean cook on shrimp. A dry surface means direct contact with heat, and direct contact is what keeps the texture firm rather than spongy.
For clams and mussels, scrub the shells under cold running water with a stiff brush and pull off any visible beards from the mussels by gripping them firmly and pulling toward the hinge end of the shell. Discard any clam or mussel that is already open and does not close when you tap it against the sink. An open shell before cooking means the shellfish inside is dead and not safe to eat.
Dry scallops are the one ingredient worth seeking out specifically: they have not been soaked in a phosphate solution, which means they brown properly and taste cleaner than wet-packed alternatives.
Handle each type of seafood differently
Each shellfish in this recipe has a different thickness and density, so each one needs a slightly different approach before it goes into the risotto. Treating them the same way will leave some overcooked while others are still underdone.
Follow this prep guide before you begin cooking the rice:
| Seafood | Prep Step | What to Watch For |
|---|---|---|
| Shrimp | Peel, devein, pat dry | Tails on or off based on preference |
| Sea scallops | Remove the small side muscle, pat very dry | The muscle is the tough rectangular piece on the side |
| Clams | Scrub shells, discard open ones | Soak in cold salted water 10 min to purge sand |
| Mussels | Scrub shells, debeard, discard open ones | Check again after cooking: discard any that stay closed |
Once everything is cleaned and dried, keep the seafood refrigerated in separate bowls until you reach the final stage of cooking the rice. You want it cold when it goes in, which helps prevent overcooking in the brief time it takes to finish the dish.
Step 3. Toast rice and start the base
This is the step where the dish starts coming together, and it sets the flavor foundation for everything that follows. Toasting the rice and building the aromatic base properly is what separates a bland bowl from one that tastes layered and intentional. When you learn how to cook seafood risotto at home, this stage is where your attention matters most because you are making decisions that affect both the taste and texture of the entire dish.
Build the aromatic base first
Start with your wide, heavy-bottomed pan over medium heat. Add the two tablespoons of olive oil and let it heat for about 30 seconds until it shimmers. Add the diced shallots and cook them for three to four minutes, stirring regularly, until they turn soft and translucent. Avoid browning the shallots, because browned alliums will add a bitter undertone to the finished risotto. Once the shallots are soft, add the minced garlic and cook for one additional minute, keeping the heat at medium so the garlic softens without burning.
The goal at this stage is to build a sweet, savory base in the fat, not to add color.
Toast the rice until it turns translucent
Add your dry, unrinsed Arborio or Carnaroli rice directly to the pan with the shallots and garlic. Stir everything together so each grain gets coated in the olive oil. Cook the rice, stirring constantly, for two to three minutes over medium heat. You will notice the edges of each grain turning slightly translucent while the center remains white. That visual change tells you the outer layer has been sealed properly and the starch release will be gradual once the liquid starts going in.
Do not walk away from the pan during this stage. The rice can move from toasted to scorched in under a minute if the heat is too high or the stirring stops.
Deglaze with wine before stock goes in
Pour in the half cup of dry white wine all at once and stir continuously. The wine will bubble aggressively for about 30 seconds and then begin to absorb into the rice. Keep stirring until the wine is almost completely absorbed and the pan looks nearly dry again. This step lifts any stuck-on bits from the bottom of the pan and adds a layer of acidity that balances the richness of the finished dish. Only once the wine is fully absorbed should you start adding your warm seafood stock.
Step 4. Add stock and stir to creamy
This is the longest stage of learning how to cook seafood risotto, and it’s also the most hands-on. Once the wine absorbs and your pan looks nearly dry, the ladle-by-ladle stock addition begins. Each ladle you add carries heat and flavor into the rice, and the steady rhythm you maintain from this point forward is what produces the creamy consistency you’re after. Keep the heat at medium and stay close to the stove.
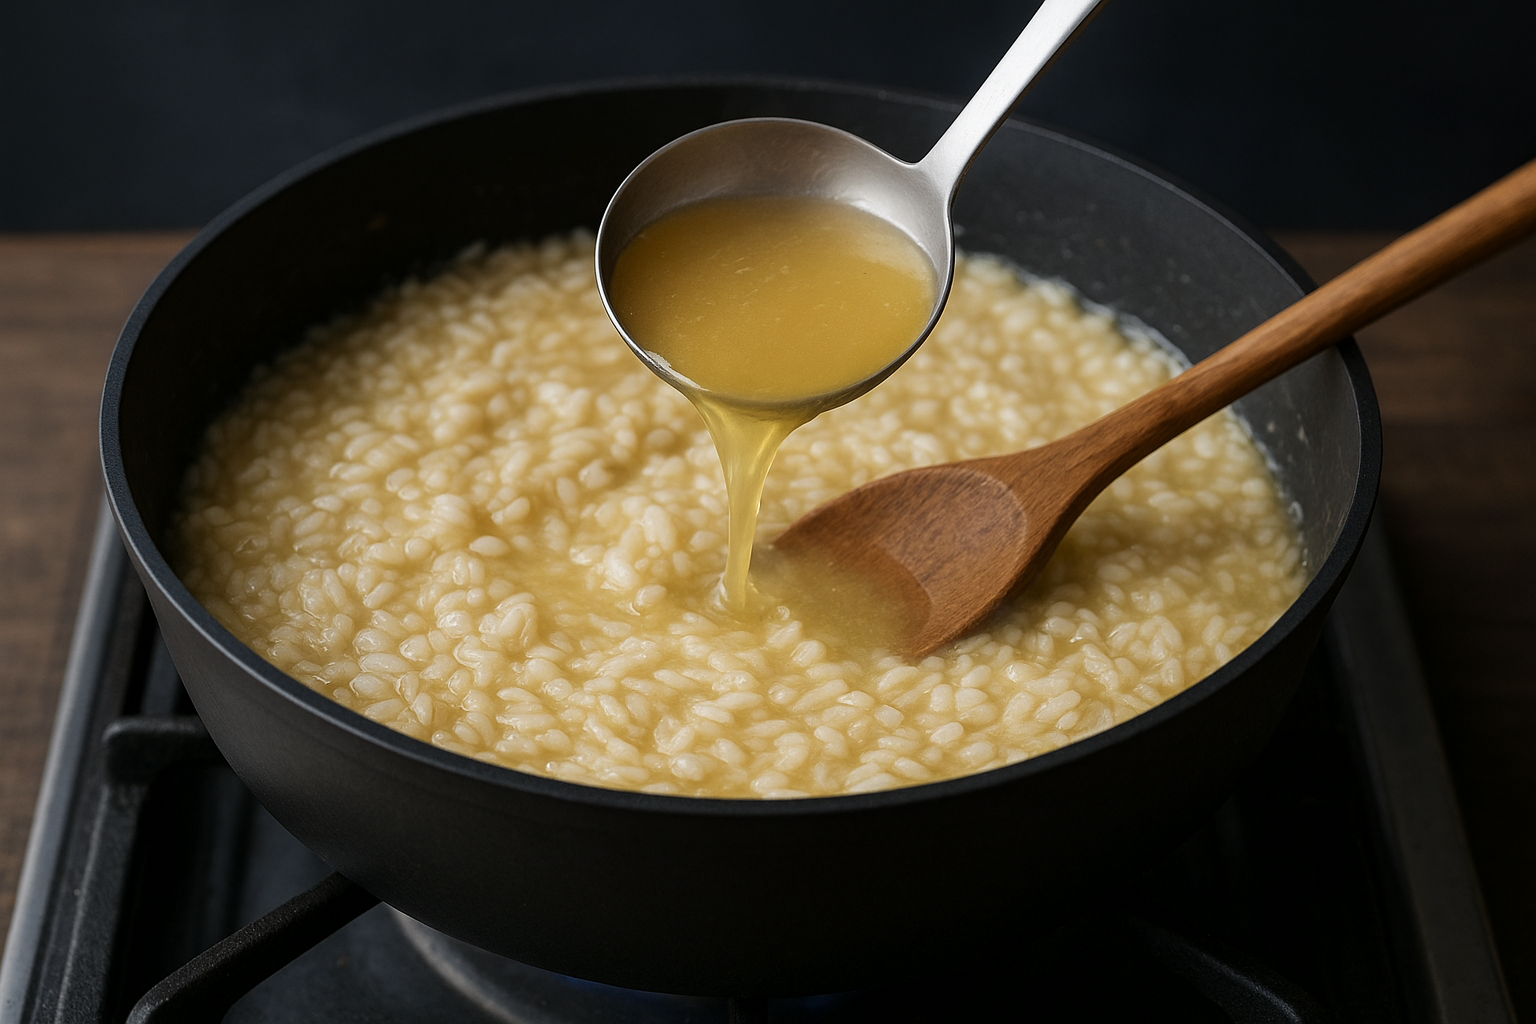
Add stock one ladle at a time
Add one ladle of warm stock, roughly half a cup, to the rice and stir immediately. The liquid will bubble gently when it hits the hot pan. Keep stirring at a moderate pace, making sure the rice doesn’t stick to the bottom. When the stock has absorbed enough that you can drag your spoon through the rice and the trail holds for a second or two before closing, you’re ready for the next ladle. This typically takes about two minutes per addition.
Do not rush this process by adding multiple ladles at once: you lose control of the texture and the starch release becomes uneven.
Repeat this addition in the same sequence throughout the cooking process. Follow this pattern for each of the six cups of warm stock:
- Add one ladle of warm stock to the rice.
- Stir continuously and reduce the heat slightly if the pan bubbles too aggressively.
- Wait until the stock absorbs to the point where the rice looks glossy but not soupy.
- Add the next ladle and repeat.
- After the fifth ladle, taste a grain of rice. The center should feel slightly firm but not chalky.
- Continue until the rice is cooked through with a slight bite and the texture looks loose and flowing rather than stiff.
Read the rice as you cook
The rice will tell you when it’s ready if you pay attention to it. A properly cooked risotto spreads slowly when you tilt the pan, rather than sitting in a firm mound or running like soup. That movement is called "all’onda" in Italian, meaning wave-like, and it’s the target consistency before you add the seafood in the next step.
Tasting the rice every few minutes during the final third of cooking gives you the most accurate read on doneness. The total time from your first ladle addition to a fully cooked rice base is typically 18 to 20 minutes at medium heat with warm stock.
Step 5. Finish and troubleshoot before serving
The final few minutes of cooking are where you add the seafood, adjust the seasoning, and correct anything that’s off before the dish goes to the table. This is also the most satisfying part of learning how to cook seafood risotto, because the decisions you make right now determine how the finished bowl looks, smells, and tastes. Stay at the stove and work through this step in sequence.
Add seafood and butter at the right moment
Once the rice is cooked to the "all’onda" consistency described in the previous step, reduce the heat to medium-low. Add the clams and mussels first since they need the most time, roughly three to four minutes, to open fully. Push them down slightly into the rice and cover the pan for two minutes to help the shells open with trapped steam. Once most shells are open, add the shrimp and scallops, folding them gently into the rice. Cook for two to three minutes, turning the shrimp once, until they turn pink and the scallops feel firm when pressed lightly with a spoon.
Discard any clam or mussel that has not opened after four minutes of cooking: it was not safe before you started and it is not safe now.
Remove the pan from the heat immediately after the seafood finishes cooking. Add the two tablespoons of cold unsalted butter and stir it through the rice using short, brisk strokes until it melts completely and the texture looks glossy. Squeeze in the lemon juice, stir in the zest, and taste for seasoning. Adjust salt and black pepper at this stage, not earlier.
Fix common problems before the bowl hits the table
Even with good technique, small issues can come up. Catching and correcting them here takes less than a minute and prevents a fixable problem from reaching your guests.
| Problem | Likely Cause | Fix |
|---|---|---|
| Rice feels stiff and clumped | Absorbed too much stock | Stir in a small ladle of warm stock off the heat |
| Dish looks too thin and soupy | Too much stock added too fast | Return to medium heat and stir for 60 to 90 seconds |
| Seafood tastes rubbery | Cooked too long or added too early | Pull the pan off heat faster next time; no fix once overcooked |
| Flavor tastes flat | Under-seasoned stock or rice | Add a pinch of salt and a squeeze of lemon right now |
Serve immediately after finishing the risotto. The texture starts to tighten as soon as it sits, so bring the bowls to the table while the dish is still loose and flowing.

Bring your seafood risotto to the table
Now you have the complete method for how to cook seafood risotto at home, from building a quick stock to finishing with cold butter and lemon juice at the end. Every step in this guide connects directly to the one that follows it, which means skipping ahead will cost you texture, flavor, or both. Work through the process in sequence, stay at the stove during the stock addition, and add your seafood only when the rice is ready to receive it.
Your first attempt will likely take close to an hour from setup to serving. Each time you cook this dish, the process gets faster because you start reading the rice instinctively rather than checking the clock. If you want to see what carefully prepared Italian seafood looks like on a plate, come visit us at La Dolce Vita Cucina in Chicago’s Portage Park neighborhood, where the kitchen runs on the same fundamentals you’ve been working through here. Reservations are available online.