
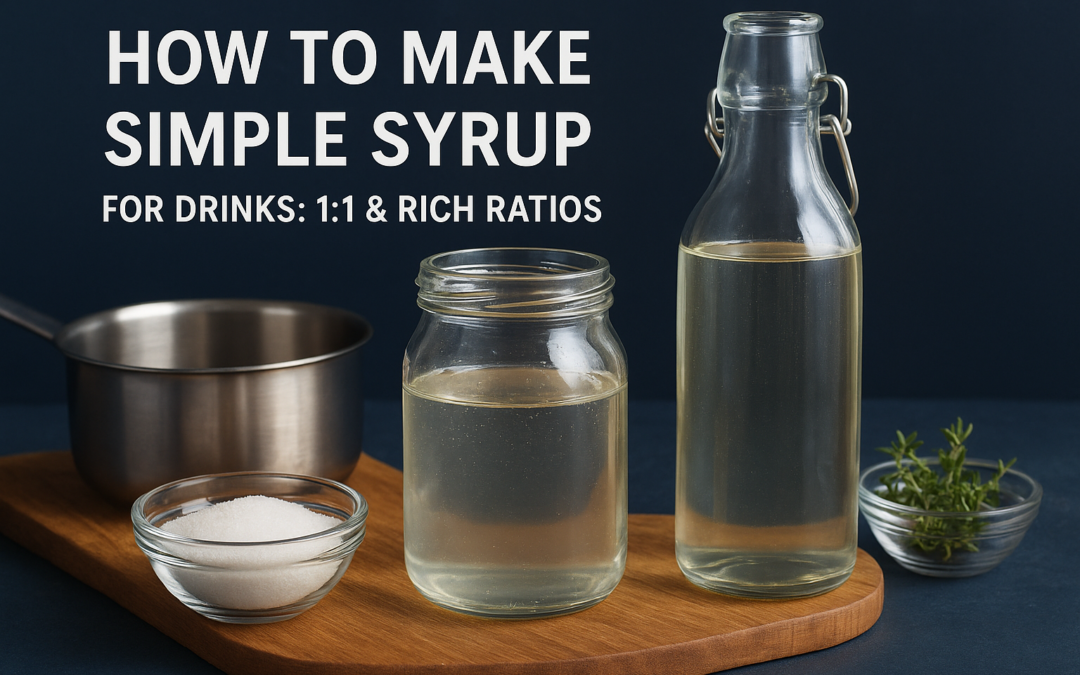
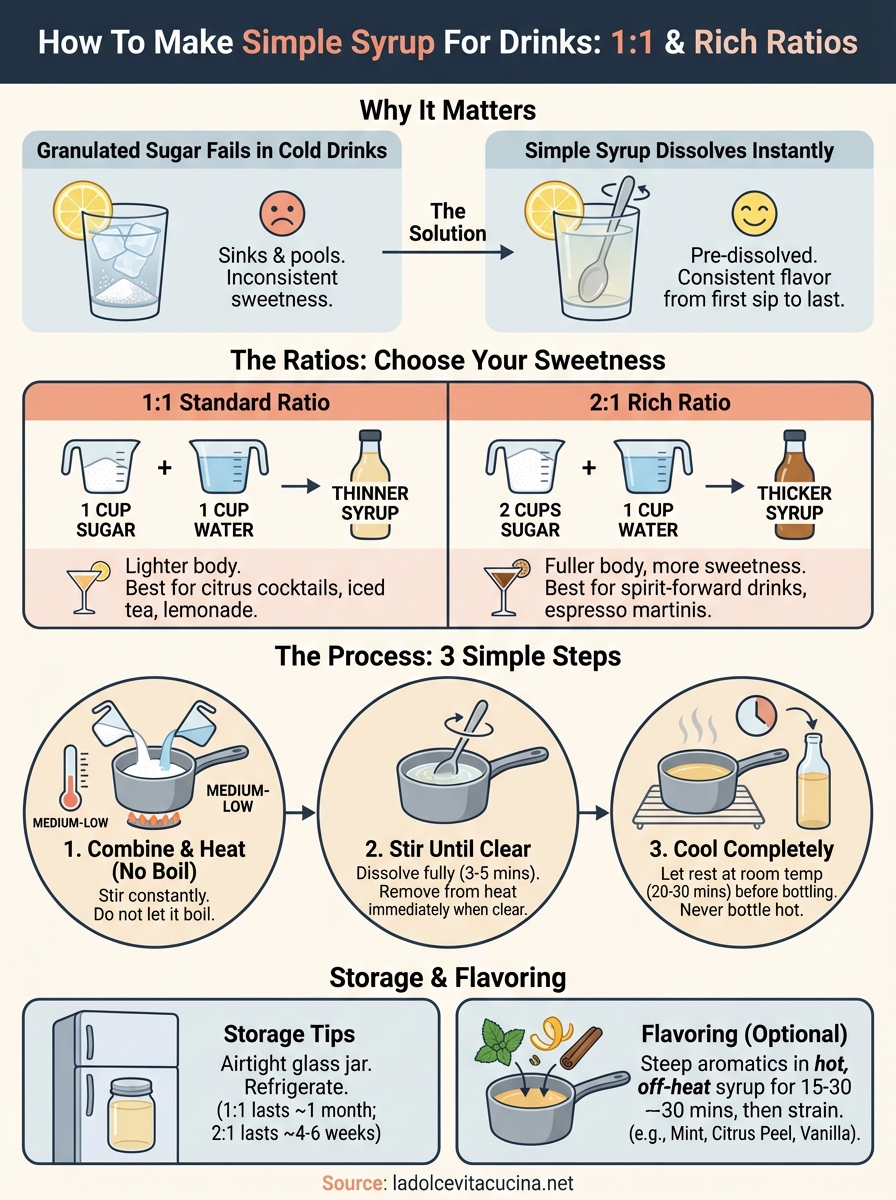
Behind every well-balanced cocktail at La Dolce Vita Cucina, there’s a small but critical ingredient doing the heavy lifting: simple syrup. If you’ve ever stirred a spoonful of granulated sugar into an iced drink and watched it sink straight to the bottom, you already know why learning how to make simple syrup for drinks matters. Sugar doesn’t dissolve well in cold liquids, simple syrup solves that problem instantly.
At our bar in Chicago’s Portage Park neighborhood, we use simple syrup across our cocktail menu to achieve consistent sweetness in every glass. It’s one of those foundational skills that takes about five minutes to learn and immediately improves everything from an espresso martini to a fresh-squeezed lemonade. No special equipment needed, no culinary degree required.
This guide breaks down the two ratios you should know, 1:1 (standard) and 2:1 (rich), along with step-by-step instructions, storage tips, and a few flavored variations worth trying at home.
What simple syrup does in cold drinks
Simple syrup is pre-dissolved sugar in water, and that distinction matters more than it sounds. When you drop granulated sugar into a cold cocktail or iced coffee, the sugar crystals need heat and agitation to break apart and integrate with the liquid. Cold drinks don’t provide either, so the sugar sinks and pools at the bottom, leaving the first half of your drink overly tart and the last sip cloyingly sweet.
Pre-dissolving sugar before it hits the glass is the only reliable way to get consistent sweetness from the first sip to the last.
Why granulated sugar fails in cold liquids
The chemistry here is straightforward. Sugar dissolves faster in warmer water because heat increases molecular movement, which separates the sucrose molecules and allows water molecules to surround and carry them. In cold water or a chilled cocktail, that process slows dramatically. You can stir a glass of iced lemonade for two full minutes and still find undissolved crystals sitting at the bottom when you’re done. That’s why bartenders and baristas have relied on simple syrup for generations: it integrates into any cold liquid instantly, without extra stirring or waiting.
How dissolved sugar changes the texture of a drink
Beyond sweetness, simple syrup adds a subtle body to whatever you put it in. A cocktail made with syrup has a slightly fuller mouthfeel than one sweetened with dry sugar, even at the same sugar concentration. That’s because dissolved sucrose thickens the liquid just enough to make it feel more rounded and less watery on the palate.
Recognizing this effect helps you use syrup more deliberately. A rich 2:1 syrup adds both sweetness and noticeable texture, which works well in spirit-forward drinks like an Old Fashioned or a Negroni variation. A standard 1:1 syrup keeps things lighter, which suits citrus-forward cocktails, iced teas, and cold brew coffee where you want sweetness without added weight. Knowing what syrup actually does is the foundation for understanding how to make simple syrup for drinks that taste balanced every time.
Choose your ratio and ingredients
The two most useful ratios when learning how to make simple syrup for drinks are 1:1 and 2:1, and picking the right one comes down to what you’re making. Equal parts sugar and water gives you a thinner, lighter syrup that works well in citrus cocktails and any drink where you want a gentle sweetness. A 2:1 ratio produces a richer, thicker syrup with more sweetness per teaspoon, so you use less of it and add less water to your drink.
Pick the 2:1 ratio when you want to sweeten a spirit-forward cocktail without diluting it.
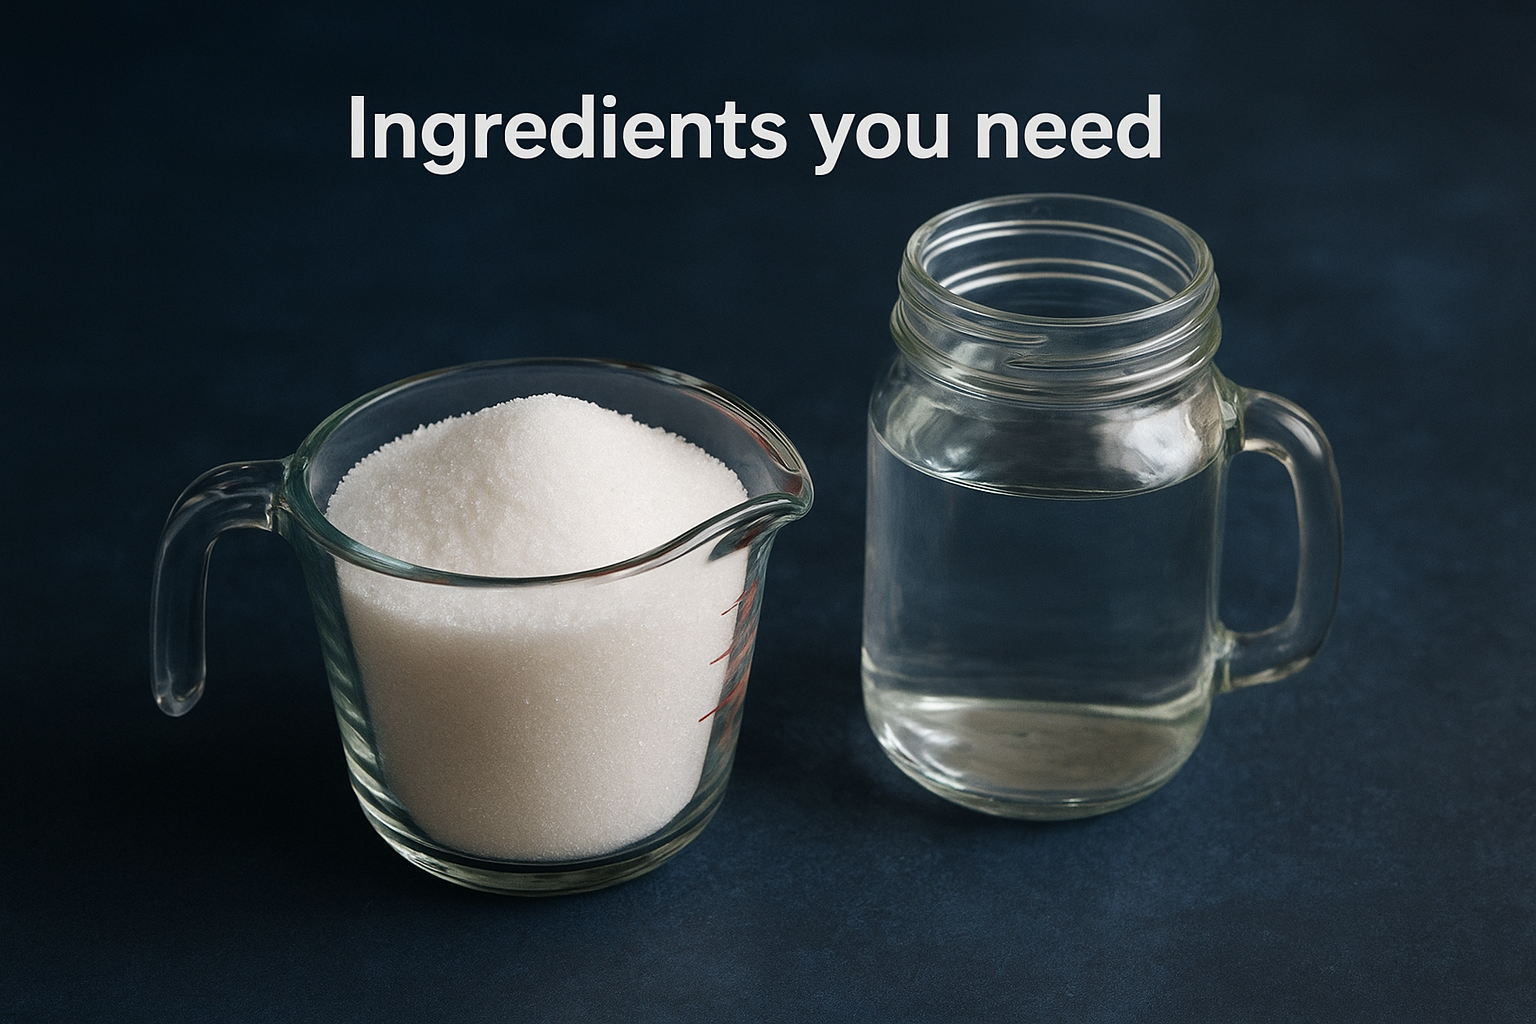
Ingredients you need
Both versions use the same short ingredient list. White granulated sugar is the standard choice because it dissolves cleanly and doesn’t alter the flavor of your drink. You can substitute raw cane sugar in a 1:1 swap with no change to the process, though it will add a very light molasses note.
| Ratio | Sugar | Water | Best for |
|---|---|---|---|
| 1:1 (standard) | 1 cup | 1 cup | Lemonade, iced tea, light cocktails |
| 2:1 (rich) | 2 cups | 1 cup | Old Fashioned, espresso drinks, spirit-forward cocktails |
How much to make at once
Making a small batch of one to two cups at a time is the most practical approach for home use. Simple syrup keeps for about one month in the refrigerator, so there is no reason to produce more than you will realistically go through. Filtered water gives you a cleaner-tasting syrup, though tap water works fine if yours doesn’t carry a strong mineral flavor.
Step 1. Dissolve the sugar without boiling
Boiling your syrup is a common mistake that drives off water through evaporation and shifts your final ratio without you realizing it. For both the 1:1 and 2:1 versions, you only need medium-low heat and steady stirring to get fully dissolved sugar. Knowing how to make simple syrup for drinks correctly means keeping that temperature controlled the entire time.
Pull the pan off the heat as soon as the liquid turns clear and you see no sugar granules left on the bottom.
The stovetop method
Combine your measured sugar and water in a small saucepan over medium-low heat. Stir continuously with a spoon or silicone spatula. The mixture will shift from cloudy to completely clear within three to five minutes, which signals the sugar is fully dissolved. You do not need to see bubbles at any point during the process.
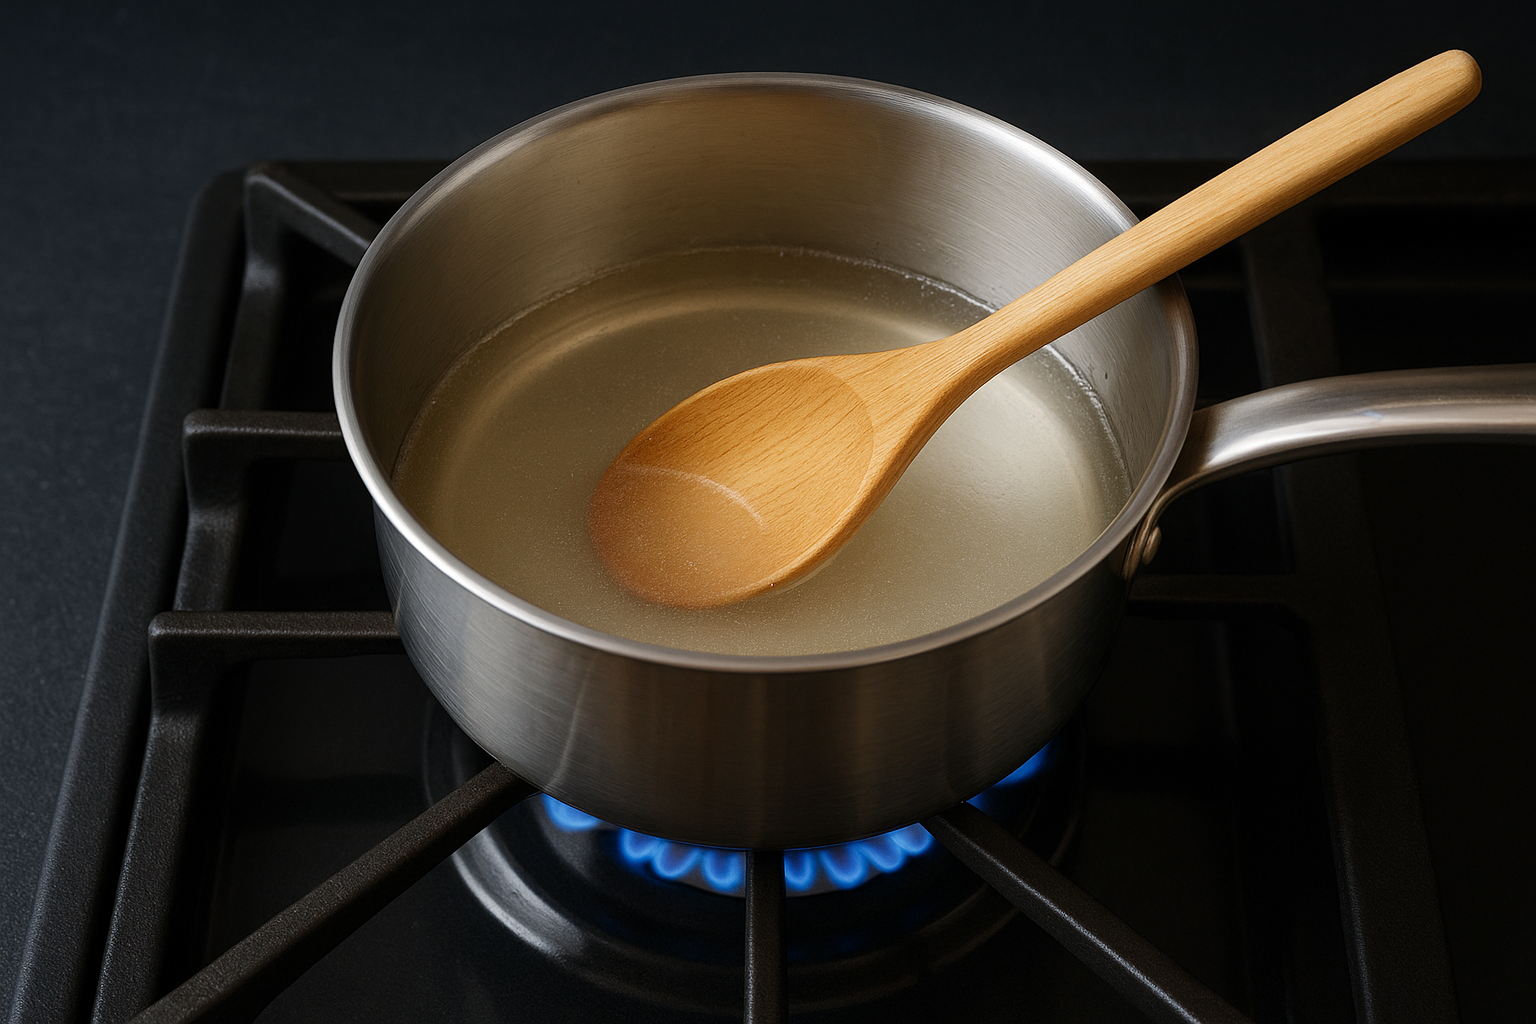
- Add cold water to the pan first, then pour the sugar on top
- Set the burner to medium-low and start stirring immediately
- Keep stirring until the liquid runs fully clear
- Remove from heat before it reaches a simmer
What to watch for
Keep your eye on two things: clarity and crystal buildup on the sides of the pan. If sugar crystallizes on the inner wall above the liquid line, use a damp pastry brush to wipe it down before it falls back in and triggers the rest of the batch to crystallize. Once the liquid runs clear and the pan sides are clean, remove it from the heat and let it rest for two minutes before transferring it to a storage container.
Step 2. Cool, bottle, and store safely
Once you pull the pan from the heat, don’t rush to seal it. Bottling hot syrup traps steam inside your container, which condenses back into water and shifts the ratio you worked to get right. Giving your syrup time to cool properly is just as important as the cooking step itself when you’re learning how to make simple syrup for drinks that last.
Let it cool before sealing
Set the pan on a wire rack or a folded kitchen towel and let it rest at room temperature for 20 to 30 minutes. You want the syrup to reach roughly room temperature before it goes into a bottle, so no residual steam escapes into the container and dilutes your final product. Pouring the syrup into a wide shallow bowl speeds up the process if you need it cooled faster.
Never pour hot syrup directly into a glass bottle; the thermal shock can crack the glass and ruin your batch.
Container choice and shelf life
A glass jar with a tight lid or a squeeze bottle works best for storing simple syrup. Glass doesn’t absorb odors and keeps the syrup tasting clean over time. Always label your container with the date you made it and the ratio you used so you don’t guess later.
| Ratio | Shelf life (refrigerated) | Signs it has gone bad |
|---|---|---|
| 1:1 standard | 3 to 4 weeks | Cloudiness, mold, off smell |
| 2:1 rich | 4 to 6 weeks | Same indicators as above |
Step 3. Flavor it for cocktails and coffee
Once you have the base technique down, flavoring your syrup is the most practical way to upgrade your home bar. You add aromatics directly to the hot syrup after you pull it from the heat, then let them steep before straining. This is where knowing how to make simple syrup for drinks starts paying off well beyond just sweetening a glass.
Steep your aromatics while the syrup is still hot but off the heat, between 15 and 30 minutes, for the cleanest flavor extraction.
Common flavoring options
The steeping method works with a wide range of ingredients. Fresh herbs, spices, and citrus peels are the most reliable starting points because they release their oils quickly into warm liquid without turning the syrup bitter or artificial-tasting.
| Flavoring | Amount per 1 cup syrup | Steep time | Pairs well with |
|---|---|---|---|
| Fresh mint | 10 to 12 leaves | 15 minutes | Mojitos, iced tea |
| Dried lavender | 1 tablespoon | 20 minutes | Lemonade, gin cocktails |
| Cinnamon sticks | 2 sticks | 30 minutes | Coffee drinks, bourbon |
| Vanilla bean | 1 bean, split | 30 minutes | Espresso martini, cream cocktails |
| Lemon peel | 3 to 4 strips | 20 minutes | Vodka sours, sparkling water |
How to steep and strain
After removing your pan from the heat, add your chosen flavoring directly to the warm syrup and cover the pan with a lid or a flat plate. Let it sit undisturbed for the time listed above, then pour the syrup through a fine mesh strainer into your storage bottle. Discard the solids, seal the container, and refrigerate immediately. Flavored syrups follow the same shelf life guidelines as plain syrup, so use them within four weeks.
Make better drinks with less hassle
Knowing how to make simple syrup for drinks puts you in control of every glass you pour. Granulated sugar belongs in baked goods, not in cold cocktails where it never fully dissolves. With a jar of syrup in your refrigerator, you skip the guesswork and get consistent sweetness from the first sip to the last, whether you’re making a quick iced coffee on a weekday or a round of cocktails for friends on the weekend.
Start with the 1:1 ratio, get comfortable with the process, then move to a rich 2:1 or a flavored version once the basic steps feel natural. A few batches is all it takes to build a small syrup collection that covers most drinks you’ll want to make at home. The time investment is under 10 minutes and the payoff shows up in every glass from here on out.
Want to see what a well-made cocktail tastes like? Visit La Dolce Vita Cucina in Chicago’s Portage Park and let our bar team handle the rest.